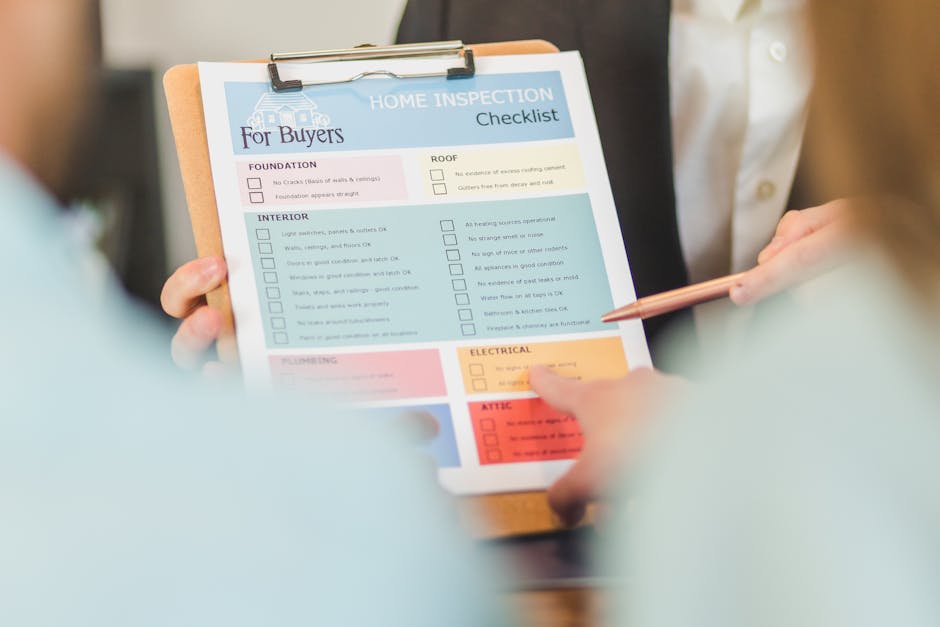
Checklist to prepare rooms for a professional clearance visit

If you are arranging a clearance, the difference between a smooth visit and a stressful one often comes down to preparation. A well-made checklist to prepare rooms for a professional clearance visit helps you clear access, protect anything staying behind, and make sure the crew can work safely and efficiently. That matters whether you are dealing with a house clearance, a flat, a garage, or an office that has simply gathered too much over time.
Truth be told, most delays happen because rooms are not quite ready: a hallway is blocked, keys are missing, items are not separated, or someone still needs to keep hold of documents. This guide walks you through what to do, room by room, with practical steps, realistic expectations, and a few expert touches that save time on the day. If you want fewer surprises and a calmer process, you are in the right place.
Why Checklist to prepare rooms for a professional clearance visit Matters
Preparing properly is not just about tidiness. It affects access, speed, pricing clarity, and how safely the team can work. A professional clearance visit usually involves moving bulky items, sorting reusable goods, and removing waste without damaging walls, floors, or shared areas. When rooms are ready, the job tends to run with far less back-and-forth.
Here is the simple reality: clearance crews work best when they can see what stays, what goes, and where they can walk. If a room is half-packed, with bags in corners and small valuables mixed into clutter, the crew may need to pause and ask questions. That wastes time. It can also raise the risk of something being taken by mistake. Nobody wants that awkward moment when someone says, "I thought that was being kept."
It also matters because different properties have different pressures. A family home after a bereavement needs a calmer, more careful approach. A rental flat between tenancies may need quick turnaround and clear access. An office clearance may involve files, IT equipment, and compliance concerns. The basic checklist stays similar, but the priorities shift a bit.
Practical takeaway: the better prepared each room is, the more likely the clearance visit will feel orderly, respectful, and efficient rather than rushed and confusing.
How Checklist to prepare rooms for a professional clearance visit Works
The checklist works by breaking a big job into small, manageable decisions before the team arrives. Think of it as pre-sorting the room so the crew can focus on removal rather than guessing. In most cases, the process follows a fairly simple pattern:
- identify what is staying, what is leaving, and what still needs a decision
- make walkways and doorways accessible
- set aside important documents, valuables, and sentimental items
- group items by room or by category if that helps the team
- flag anything fragile, hazardous, or unusually heavy
- confirm access details, parking, and any building restrictions
It sounds straightforward, and mostly it is. But the detail matters. For example, in a loft clearance, access may be the main issue. In a garage clearance, the problem may be buried items and sharp objects. In a home clearance, the challenge is often emotional clutter, where people have good intentions but no clear system. That is where a checklist earns its keep.
Many people also use the checklist as a communication tool. If relatives, tenants, landlords, or colleagues all have a say, a shared list prevents crossed wires. You do not need a perfect system. You just need one that is clear enough for everyone involved.
Key Benefits and Practical Advantages
A proper room-preparation checklist delivers more than neatness. It creates control at a point when things can otherwise feel a bit chaotic.
1. Faster clearance on the day. When items are grouped and access is open, the team can work without stopping every five minutes to ask where things belong.
2. Lower risk of accidental removal. Clear labels, separate piles, and a quick final walkthrough reduce the chances of keep-items ending up in the van. A small win, but a meaningful one.
3. Better quote accuracy. If the crew can see the real volume, awkward access, and special handling needs, pricing tends to be more reliable. That is especially useful when comparing pricing and quotes before booking.
4. Safer working conditions. Loose cables, broken furniture, hidden glass, and blocked exits are all easy to miss in a cluttered room. Preparation reduces those hazards.
5. Less emotional strain. This is easy to overlook. If you are clearing a loved one's home or a long-time family property, having clear steps can make the process feel steadier. Not cheerful exactly, but steadier.
6. Better reuse and recycling outcomes. When items are separated properly, reusable furniture, metal, cardboard, and general waste can be handled more sensibly. For readers interested in the wider impact, the company's recycling and sustainability approach is worth understanding.
Who This Is For and When It Makes Sense
This checklist is useful for anyone arranging a room-by-room clearance, but it is especially helpful in these situations:
- Homeowners preparing for a full or partial house clearance
- Landlords getting a property ready between tenancies
- Tenants who need to leave a flat clear and accessible
- Executors and families dealing with a sensitive estate clearance
- Office managers clearing desks, storage rooms, or old equipment
- People with lofts, garages, or sheds that have become storage catch-alls
It also makes sense if the property has tight access, shared hallways, or parking restrictions. In London, for example, a narrow staircase or controlled parking can slow things down if no one has planned ahead. And yes, that one missing lift key can turn a simple visit into a comedy of errors.
If you are unsure which service fits best, it helps to compare the job type first. A full house clearance is not the same as a flat clearance, and both are different again from an office clearance. The room-prep principles overlap, but the priorities shift.
Step-by-Step Guidance
Below is a practical way to prepare each room without overcomplicating the job. Take it one room at a time. That makes everything feel less overwhelming, which honestly is half the battle.
1. Walk through the property before doing anything else
Start with a slow walkthrough. Open cupboards, glance under beds, check wardrobes, and note anything that needs deciding. Look for bulky furniture, loose waste, sensitive papers, keys, medications, chargers, and personal documents. If the room smells damp or smoky, flag it too, because that can affect handling and ventilation.
2. Decide what must be kept separately
Set aside anything that should not be taken. That usually includes passports, financial papers, jewellery, family photos, house keys, prescription items, and legal documents. Put them in one clearly marked box or bag and move them to a safe room.
A simple rule helps: if you would be annoyed to lose it, do not leave it mixed in with clearance items. Seems obvious, but in a messy room obvious things get weirdly invisible.
3. Create three clear zones in each room
Use three informal zones if possible:
- Keep - items staying in the property
- Clear - items to be removed
- Unsure - items that need a final decision
This is especially useful in bedrooms, lofts, and garages where clutter tends to blend together. If you label boxes or tape off sections, even better.
4. Clear walkways and access points
Hallways, doors, landings, and stairs should be unobstructed. Move shoes, laundry baskets, rug corners, and small furniture items out of the route. A crew carrying a wardrobe or sofa needs room to pivot. That turning space matters more than people realise.
5. Separate hazardous or awkward items
Some items need extra care: paint tins, batteries, old cleaning products, chemicals, needles, sharp tools, broken glass, and heavy mirrors. If you have anything hazardous, mention it in advance. Certain items may require special handling or separate disposal methods, and a reputable team should be able to advise sensibly.
6. Check furniture that needs dismantling
Large beds, wardrobes, shelving, and desks may need to come apart before removal. If you can remove a few obvious screws or clear surrounding items, do it. If not, at least tell the clearance team what needs dismantling. It saves time, and it avoids damage from trying to force something through a doorway at an angle that is never quite right.
7. Photograph rooms if several people are involved
If family members, landlords, or colleagues need visibility, take a few photos before and after sorting. This is not about turning the process into a spreadsheet of doom. It is just a useful record, especially when belongings are spread across multiple rooms.
8. Confirm practical access details
Check parking, entry codes, concierge rules, stair access, and whether someone needs to be present on arrival. If the property is in a busy area, make sure the team knows where they can load safely. A two-minute phone call can prevent a twenty-minute delay.
9. Do a final room sweep
Before the crew starts, look once more around the edges of each room: behind doors, on top of wardrobes, in drawers, under sinks, inside shelves, and in window alcoves. Small items often hide in plain sight. That last sweep catches more than you would think.
10. Stay available for quick decisions
If possible, be nearby during the visit or appoint one clear decision-maker. Teams move faster when they can ask one person for a quick yes or no instead of waiting for three texts, two calls, and a family group chat that somehow turns into a debate about a lamp shade.
Expert Tips for Better Results
These are the small things that make a noticeable difference. Not flashy, just useful.
- Label boxes by room and purpose. For example: "Bedroom - keep," "Kitchen - recycle," or "Office - shred."
- Group similar items together. Small electricals, books, or linens are quicker to assess when they are together.
- Leave one clear path in every room. Even if the room is still cluttered, one access route can keep the job moving.
- Separate sentimental items early. Once the physical clearing starts, emotional decisions get harder, not easier.
- Do not overpack bags. Heavy bin liners split at the worst possible moment. Always.
- Ask about reuse options. Furniture and usable items may be suitable for donation, resale, or separate furniture clearance rather than general waste.
One practical observation from real jobs: the rooms that run best are not always the tidiest. They are the rooms where decisions are clear. That is the real trick.
If you are dealing with a larger mix of furniture and general waste, you may also find it useful to understand the differences between furniture clearance and furniture disposal. Knowing the distinction helps you plan what stays reusable and what needs to go.
Common Mistakes to Avoid
Even careful people make the same handful of mistakes. The good news is they are easy to avoid once you know what to watch for.
- Leaving decisions until the last minute. The day of the visit is not the best time to wonder whether that box of cables matters.
- Mixing valuables with rubbish. This happens more often than you might think, especially in drawers and loft boxes.
- Blocking access routes. A clearance team cannot move efficiently if every doorway has a small obstacle course in front of it.
- Forgetting about shared spaces. In flats and offices, lifts, stairwells, reception areas, and loading bays all matter.
- Not flagging hazardous items. Old paints, solvents, and sharps need care. Mention them early.
- Assuming everything can be taken in one load. Larger properties or mixed waste often need more than one pass or a split approach.
Another one, and this is a classic: people clear the obvious clutter and leave the awkward cupboard until the team arrives. Then everyone stands there staring at a shelf of mystery items. It happens. More than you'd expect.
Tools, Resources and Recommendations
You do not need special equipment to prepare a room for clearance, but a few basics help a lot:
- bin bags or heavy-duty sacks for loose waste
- masking tape or sticky labels for room marking
- marker pens for quick notes
- boxes for documents, valuables, and keepsakes
- gloves for dusty lofts, sheds, or garages
- a torch for dark corners, cupboards, and loft spaces
- phone camera for quick reference photos
For larger clearances, a measured approach can help. That might mean handling some rooms first and leaving others for the team. A garage clearance, for instance, can often be prepared separately from the rest of the property. The same goes for a loft or garden outbuilding. If you need that kind of staged approach, the pages on garage clearance, loft clearance, and garden clearance may help you plan the order of work.
If the job is more of a whole-property clear-out, then a broader service such as home clearance may be more suitable. For particularly full properties, a house clearance can provide the right scale and workflow.
Law, Compliance, Standards, or Best Practice
If the clearance includes waste removal, it is wise to think about legal and environmental responsibilities. In the UK, householders and businesses should avoid fly-tipping, use proper disposal routes, and choose responsible operators. You do not need to memorise every rule, but you should be confident that waste is handled properly and not dumped somewhere it should not be. That part is non-negotiable.
For business premises, extra care may be needed around confidential paperwork, old devices, and mixed waste streams. A sensible operator should be able to talk plainly about handling, sorting, and disposal practices. If you want a deeper look at the kinds of checks that matter, the article on licensed waste carriers is a useful background read, and council rules on flytipping and penalties offers helpful context too.
There is also a practical health and safety angle. If a room contains broken items, mould, heavy lifting risks, or sharp debris, preparation should be cautious. Good practice means not asking people to drag unsafe items through narrow spaces when they can be flagged first. It is just common sense, but common sense is not always common when a property is under pressure.
For a trusted service, it can also help to review a company's health and safety policy and insurance and safety information before booking.
Options, Methods, or Comparison Table
Not every room needs the same level of preparation. Sometimes a full sort makes sense; other times a light clear-up is enough. Here is a simple comparison to help you decide.
| Preparation method | Best for | What you do | Typical upside | Possible downside |
|---|---|---|---|---|
| Light prep | Small clearances or already-sorted rooms | Clear access, remove valuables, label obvious keep items | Quick and low effort | May still need guidance during the visit |
| Room-by-room sort | House, flat, or loft clearances | Separate keep, clear, and unsure items | Better control and fewer mistakes | Takes longer before the team arrives |
| Priority-item removal | Sensitive estates or shared properties | Remove documents, keepsakes, and essentials first | Protects important items early | Needs a careful final walkthrough |
| Staged clearance | Large or complicated properties | Handle one area at a time over multiple visits | Less overwhelming and more flexible | Can take longer overall |
If you are comparing approaches for cost and convenience, staged clearance often suits bigger homes or places with mixed storage areas. A single-pass job is simpler, though, when access is easy and decisions are already made. There is no one perfect answer here. Just the right fit for the property in front of you.
Case Study or Real-World Example
Here is a realistic example from a typical clearance scenario. A family arranged a visit for a two-bedroom flat after a long tenancy. The main problems were a crowded hallway, a packed bedroom wardrobe, and a kitchen with a mixture of cookware, food waste, and paperwork in drawers.
Before the team arrived, they spent about an hour doing three things: they separated passports and bank letters into one folder, moved three boxes of personal keepsakes into the spare room, and cleared the hallway so doors opened fully. They also took quick photos of the rooms, mainly so everyone agreed what was staying.
On the day, the team did not need to stop and ask what every bag contained. The flat was still busy, to be fair, but it was workable. The crew could remove larger items first, then deal with smaller contents. The family later said that the preparation made the process feel less abrupt and a lot less stressful than they expected. Nothing dramatic. Just smoother, calmer, and more predictable.
That is usually the goal, isn't it? Not perfection. Just less friction.
Practical Checklist
Use this checklist before the clearance visit. It is designed to be quick to scan, but still thorough enough to be genuinely useful.
- Walk through every room that is part of the clearance
- Identify what stays, what goes, and what still needs a decision
- Remove valuables, documents, medication, keys, and personal keepsakes
- Label boxes or bags clearly
- Clear hallways, stairs, and doorways
- Flag fragile, heavy, or hazardous items
- Separate reusable items from general waste where possible
- Check whether large furniture needs dismantling
- Confirm parking, entry, and access instructions
- Make sure someone is available for quick decisions
- Take photos if several people need to review the rooms
- Do a final sweep of drawers, cupboards, and corners
- Keep cleaning products, loose batteries, and sharp items clearly identified
- Tell the team about anything awkward before they start
- Have a bag or box ready for items you might want back later
Quick room-by-room reminder:
- Bedrooms: check wardrobes, under beds, bedside drawers, and dressing tables
- Kitchens: empty cupboards, separate food waste, and set aside documents or appliances
- Bathrooms: clear medicines, toiletries, and small sharps or batteries
- Lounges: check shelving, media units, cushions, and storage furniture
- Lofts and garages: watch for dust, insulation, broken items, and forgotten boxes
- Offices: separate files, devices, chargers, and confidential paperwork
If the clearance includes bulky seating or old units, a dedicated furniture team can often help with the awkward bits, especially when items are too large for a regular vehicle load. For business premises, business waste removal may be a better fit when there is a mix of furniture, packaging, and general rubbish.
Get a free quote today and see how much you can save.
Conclusion
A good checklist to prepare rooms for a professional clearance visit is really a planning tool in disguise. It helps you protect what matters, clear the path for the crew, and reduce the sort of day-of confusion that slows everything down. When the rooms are ready, the whole job tends to feel more manageable. Less guessing, fewer mistakes, and a lot less stress.
If you are facing a small flat, a full house, or a cluttered loft that has got a bit out of hand, do not aim for perfection. Aim for clarity. Clear access, clear decisions, clear communication. That is usually enough to turn a difficult job into a workable one. And once the first room is done, the rest tends to follow.
Take a breath, start with one room, and go from there. Bit by bit, it comes together.
Frequently Asked Questions
What should I remove before a professional clearance visit?
Remove valuables, personal documents, medication, keys, jewellery, and any items you definitely want to keep. If there is any doubt, set it aside in a separate box and label it clearly.
Do I need to empty every room completely first?
Not usually. The main aim is to make access clear and separate keep items from clearance items. Some rooms may only need light preparation, while others need a more detailed sort.
How tidy does a room need to be before clearance?
It does not need to be spotless. It does need to be workable. If the team can walk safely, identify items, and remove contents without constant interruption, that is usually enough.
Should I label items before the clearance team arrives?
Yes, if possible. Simple labels such as "keep," "clear," or "unsure" make the process much easier and reduce the chance of errors.
What if I am not sure whether something should stay or go?
Put it in an "unsure" pile and make a final decision before the team begins. If you leave too many uncertain items mixed in, the clearance can slow down very quickly.
How do I prepare a loft or garage for clearance?
Clear a safe route in and out, watch for dust and sharp items, and move anything valuable or fragile to one side. Loft and garage spaces often contain hidden items, so a careful sweep helps a lot.
Are hazardous items dealt with the same way as normal waste?
No. Paint, chemicals, batteries, sharps, and similar items may need special handling. They should be flagged in advance so they can be dealt with properly and safely.
Will preparing rooms properly reduce the cost?
It can help keep the job efficient and may make the quote more accurate, especially if access is easy and the volume of waste is clear. Exact pricing depends on the property and the items involved.
What is the best way to handle sentimental items during a clearance?
Separate them early, before the physical work begins. Sentimental decisions get harder once the room starts emptying, so it helps to set them aside in a dedicated box or cupboard.
Can I stay in the property during the clearance?
Usually, yes. Many people stay on-site to answer quick questions and make decisions. If that is not possible, appoint one person to handle queries so the team does not need to chase several contacts.
How do I prepare rooms for an office clearance?
Clear desks, separate confidential documents, identify IT equipment, and make sure access to storage areas and loading points is straightforward. Office clearances often need a little more coordination because of files and devices.
What is the biggest mistake people make before a clearance visit?
Leaving decisions too late. The rooms that run best are usually the ones where keep items, clearance items, and access routes have already been sorted out before the team arrives.
If you are planning a clearance soon, a few calm hours of preparation can make the whole visit feel far more manageable. And that, frankly, is a relief worth having.